Stream Status

FULL FGC STREAM LIST

RECENT VIDEOS
MEMBER ACCESS
[ TATSUNOKO VS CAPCOM MAIN PAGE & CHARACTER SELECT ]
Friday
Jan222010

Karas - Tatsunoko

"The duty of a karas ... is to protect the city ..."

TATSUNOKO VS CAPCOM BIO:

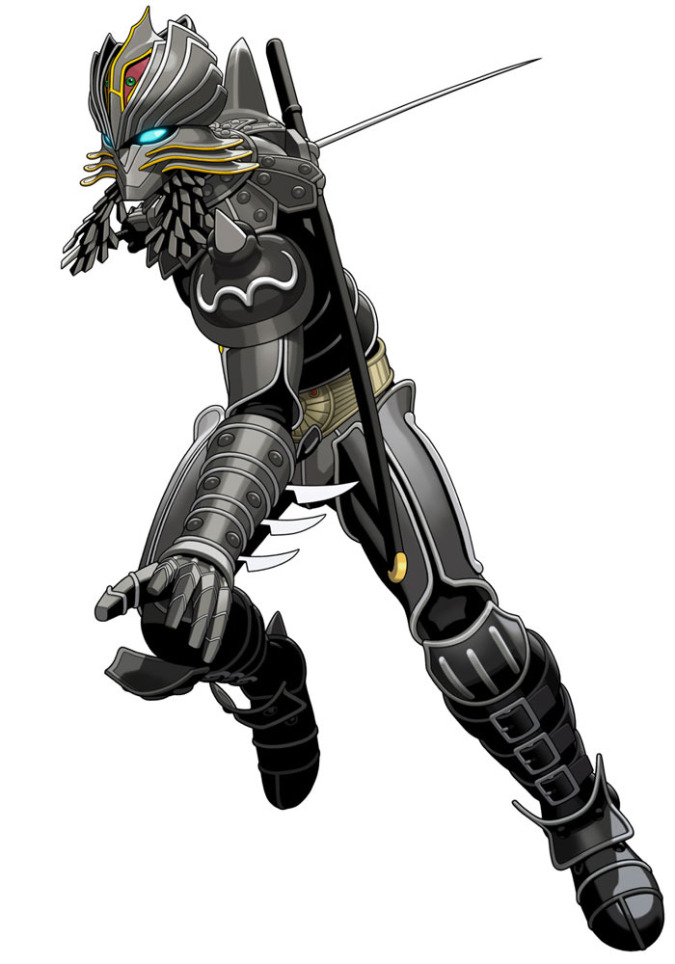
Karas is the dark hunter who tries to maintain the order between the human world and the Spirit world. His partner, a cat-like female spirit, acts as his liaison, listening to pleas for help from the human world. When someone needs to be punished, she summons Karas to take care of the matter.


CHARACTER ORGIN

Karas originated in a six-part self-titled anime mini-series which commemorated Tatsunoko's 40th anniversary of anime production. The first episode aired on Japanese pay-per-view TV in March 2005.


Gameplay Details:

Karas isn't the monster he was in Cross Generation of Heroes, but he's still a force to be reckoned with in the right hands. Karas has many tools at his disposal and is good at using them. He has ways to get out of troublesome situations and ways to pressure the opponent almost constantly. His normals have impressive range and speed, allowing him to quickly shut down direct approaches and he has the unique ability to bring the opponent to the corner of the stage no matter where he is. Unfortunately, Karas has the lowest amount of health in the entire game and for this reason he can't afford to take too many hits. Couple this with the fact that Karas's damage is very low until the player masters very difficult advanced combos, and you have a character who is not for beginners, no matter how cool he might look in action.


CHARACTER STATS

Difficulty: advanced

Style: Poke and Punish/offensive rushdown

Defensive power: While his HP is awful, he has some excellent defensive tricks to keep himself safe. Many of his specials are useful for stopping agressive opponents, and he even has a counter hyper which starts in an instant.

Offensive power: Advanced combos are needed to deal just above average damage by other character's standards. He can combo into unblockable setups for much greater damage, but this requires baroque and the right partner.

Approach strength: He can approach with relative safety thanks to his high-priority normals. His unique dash lets him pass through opponents and do many confusing crossup tricks.

Combo ability: He has many ways to naturally extend his own combos, and can combo the opponent relentlessly until he's forced to stop through game system limitations. An optimal advanced Karas combo will take the opponent from one side of the screen to the other, then back again and then into the air. These combos don't do as much damage as some other characters with better strength, but they are consistant no matter where Karas is on screen, and do not require any meter or assist. His ability to put the opponent in the corner also lets him reliably combo into unblockable resets with the right partner...and even then he is able to use baroque and mega crash offensively to further continue his unblockable resets infinitely until he runs out of meter. With perfect execution and enough meter, Karas can still take off an entire life bar in one 'combo'.

Meter Usage: Karas mainly conserves his meter for megacrash or Crossover air raids. His ability to keep the opponent under pressure allows him to build meter very quickly. With unblockable setups he can build meter even faster.

Key Techniques: Players MUST learn how to link all hits in his kasha ending with yashaguruma in order to deal sufficient damage per combo. The timing on this combo is strict. Using his F+H unblockable correctly in combos with the right assist and on the tag is also vital for doing damage. Another difficult tactic high level players will want to master is comboing into his 'slide loop' to the corner, which is still possible but nowhere near as deadly as it was in Cross Generation of Heroes.

Partner Options: Anyone with an assist who can help Karas set up unblockables is vital, but bonus points are added to those who can offer powerful air combos after a Crossover Air Raid. These characters are Chun Li, Megaman Volnutt, Tekkaman Blade, Yatterman-2, Soki and Saki. Karas himself can benefit anyone who needs a reliable defensive anti-air or projectile shield.


Thursday
Jan212010

Special Moves

UNGAIKYO

    
QUARTER CIRCLE FORWARD + ATTACK

A defensive attack. Karas spins his sword in front of him at blinding speeds to create a protective disk. The startup is almost instant and it will block almost any frontal assault and can also be used as an anti air, staggering the opponent if they get hit by it. As a bonus it also reflects projectiles. It's not safe on block, so it should be used with care. The Light version is the safest whereas the other version stay out slightly longer and have more recovery.


NARUKAMI - IN AIR OK

    
FORWARD DOWN DOWN-FORWARD + ATTACK

Karas performs a shoryuken style dragon punch. It has no invincibility during it's startup and travels completely vertically, but is fast and covers his body well. The button pressed determines the height and number of hits, with L being the shortest and safest, and H being the highest and most powerful. Used mainly as a combo ender, Mirror Blade is usually a better anti air. Another use for this special is for mixups. It can be baroqued mid flight to allow Karas to perform a quick aerial overhead attack followed by a low.


KASHA

   
CHARGE BACK, FORWARD + ATTACK

The first part of Karas's mighty rekka (3 part) attack. Karas makes a fast dash into his opponent, damaging them with a sonic boom. The light version travels the shortest distance but has the fastest startup, the mid version goes a little further and has more startup, and the strong version has the most startup but goes nearly full screen. Great for surprising opponents from across the screen and vital for continuing combos. It is unsafe on block but it can be canceled into a range of things, including some normals! Followups are as follows:

YOINAGI

DURING KASHA    
QUARTER CIRCLE FORWARD + ATTACK

A very fast low strike from Kasha. Stuns the opponent. If the opponent is high enough, it's possible to combo into Yashaguruma from here, but the timing is strict. This is vital to Karas's overall damage output, so you should learn how to do this. The button pressed causes the hit properties to differ. The light version causes the least knockback, the mid version causes moderate knockback and the heavy version props the opponent up very high, but has some lag. If you're looking to combo into Yashaguruma, then make sure never to use the Heavy version, since it is very hard to get it to connect.

YATO

DURING YOINAGI    
BACK, FORWARD + ATTACK

Karas slices through the opponent, sending them into a spinning knockdown behind him. Karas can then combo into his Moonlight Execution super from there, but it will otherwise end his combo unless an assist is used to keep it going. Karas has better options most of the time.

YASHAGURUMA
DURING YONAGI   
 FORWARD + HARD ATTACK

A wild jumping slash. A bit slow to start up but has a huge hitbox and hits overhead. If it connects it sends the opponent slamming into a wall. It will combo from Yoinagi, making it a necessary combo extender as well as his only natural mixup. This move may be hard to link at first, but it's one of his most important combo extenders.

TOBIMIZUCHI

    
HALF CIRCLE BACK + ATTACK

Karas poses and shoots out his trademark steel cable, which latches onto the opponent and stuns them slightly. If a command is put in during the stun, Karas will follow up with another attack. It can be destroyed by other attacks and the chord will hit giant characters, allowing Karas to launch and combo them. Followups are as follows:

UKIFUNE

DURING TOBIMIZUCHI     
QUARTER CIRCLE FORWARD + ATTACK

Karas tackles the opponent with a flying kick, carrying them all the way over to the corner of the stage before slamming them into the ground with his sword so hard that their body bounces up off the ground. Another way to further extend Karas's impressive combos, the key to this move is that Karas can actually pick the opponent up off the ground with a well-timed attack after their body is bounced. Otherwise it's a nice way to get the opponent into the corner.

TSURIGITSUNE

DURING TOBIMIZUCHI   
QUARTER CIRCLE BACK + ATTACK

Karas flings the opponent behind him with his chord. The light version has barely any lift, the mid version throws them up into the air and the hard version flings them back violently, causing wallbounce. Not as useful as the Ukifune for the sole reason that only one wall bounce is allowed per combo, and Karas will want that wall bounce reserved for Yashaguruma. The mid version seems nice at first, but Ukifune comes to the same thing in the end and does more damage.


Wednesday
Jan202010

Hyper Combos

ZAN EI JIN

DURING UNGAIKYO     
QUARTER CIRCLE FORWARD + ANY TWO ATTACKS

The command needs to be input while the mirror blade is still spinning. Karas turns the disk on it's side and then disappears, proceeding to direct the spinning sword back and forth across the screen, slicing the opponent repeatedly until throwing them behind him with a final slash after which he retrieves his sword. This attack is one of the most powerful level 1 Hypers in the game that doesn't require any kind of charge, and the fact that it tracks the opponent wherever they are on screen means that it can't miss it's target. It does great chip damage, even through advance guard. It's very useful in Delayed hyper Cancels due to the way it holds the opponent in one place on the screen for a while. However, Karas often needs to be careful about spending meter, so this attack isn't used all that often.


SHIRANUI

   
FORWARD DOWN DOWN-FORWARD + ANY TWO ATTACKS

Karas poses with his sword in front of him. Will counter any physical normals and specials with a powerful soul-stealing slash. Karas isn't often put in a position where it's a good idea to use this, since using it without reason will give the opponent a free combo on Karas, which often is enough to spell the end for the fragile assassin. Karas often has better ways to punish agressive opponents too. However this attack can be used in DHC's to cover whiffed hyper combos from counterattack, since the startup is almost instant.


HIEI ZANGETSU

     
HALF CIRCLE BACK + ANY TWO ATTACKS

Karas pauses for a moment as a crow-shaped shadow gathers around him before shooting across the screen. If it hits, Karas will suddenly appear in front of the opponent, binding them with strings of darkness before performing his ethereal killing technique from the first episode of the Karas OVA. Deals fairly substantial damage but has the interesting property of hitting downed opponents, making Karas the only character in the game who can confirm a level 3 off a throw. Karas builds meter quickly, so sometimes it is better to use this attack to finish a combo before the opponent is able to Mega Crash away.


Tuesday
Jan192010

Assists

Assist

One of the better assists in the game. Karas performs his mirror blade, complete with projectile-reflecting action. Just like the original move it causes stagger and acts as an agressive shield to halt opponent offense.


Variable Counter

Karas uses his light Narukami attack. A very fast Variable counter and one of the best as it has full invincibility throughout.


Variable Hyper combination

When summoned for a Variable Hyper combination, Karas will use his Illusion blade super. This is quite decent in VhC's as it tends to hold the opponent in place for some time, meaning that point characters with short supers will enjoy using it.

Sunday
Jan172010

Combos

Beginner's combo

D+L, M, D+M, H(2 hits), Kasha (pause) M, D+M, H(2 hits), launcher, jump, L, L, M, M, jump, M, M, H-Narukami

Bread and Butter

D+L, M, D+M, H(1 hit), Tobimizuchi > Ukifune (hold B while flying), B + M, DB+M, H (2 hits), H-Kasha > L-Yoinagi > Yashaguruma, L, L, L, M, H (2 hits), H-Kasha, launcher, jump, L, L, M, M, jump, M, M, H-Narukami

Advanced Bread and Butter 'slide loop' combo

http://www.youtube.com/watch?v=gtjqmTggqjU

(thanks to Trag for this video)

D+L, M, D+M, H(1 hit), Tobimizuchi > Ukifune (hold B while flying), B + M, DB+M, H (2 hits), slight pause, D+H, H-Kasha > M-Yoinagi > Yashaguruma (opponent bounces behind karas), L, M, H (2 hits and start holding back now) D+H, H-Kasha, slight pause, D+H, H-Kasha, D+H, L-Kasha, launcher, jump, L, L,M,M, jump M, M, H-Narukami

Advanced Unblockable Loop (requires assist, baroque and mega crash)

D+L, M, D+M, H(1 hit), Tobimizuchi > Ukifune (hold B while flying), B + M, DB+M, H (2 hits), slight pause, D+H, H-Kasha > M-Yoinagi > Yashaguruma (opponent bounces behind karas), L, M...

now at this point, we are assuming Karas is using an assist that will allow a faultless unblockable setup. The timing for each assist is different depending on the character. For this example we will use Polimar, since his is perhaps the easiest.

...H (On the fist hit press P, wait until just before the second polimar kick lands, then -), F+H (full charge), BAROQUE, D+L, M, D+M, H(1 hit), Tobimizuchi > Ukifune (hold B while flying), B + M, DB+M, H (2 hits), H-Kasha > L-Yoinagi > Yashaguruma, L, L, L, M, H (2 hits), H-Kasha, launcher, jump, MEGA CRASH...

now the timing here is very strict. You must megacrash immediately after leaving the ground, but if you do it too soon the megacrash will miss. If you did it right, Karas should land almost immediately after using the Megacrash.

...M, H (On the fist hit press P, wait until just before the second polimar kick lands, then -), F+H (full charge), BAROQUE, D+L, M, D+M, H(1 hit), Tobimizuchi > Ukifune (hold B while flying), B + M, DB+M, H (2 hits), H-Kasha > L-Yoinagi > Yashaguruma, L, L, L, M...

From here on, if you have the meter for it you can attempt to repeat the megacrash portion of this loop. If you no longer have 2 bars for a megacrash, then proceed as follows:

...H(2 hits) + P, L, M, H (2 hits), H-Kasha, launcher, jump, L, L, M, M, jump, M, M, H-Narukami

Phew. That sure is a lot of inputs. But if you did it right your opponent should be pretty much finished. Now you just have to make sure you don't get hit, since you no longer have any meter.

Sometimes an opponent can escape the unblockable by tagging out if your timing wasn't perfect. In this case, simply baroque and block the tag and then punish their partner with the whole thing from the beginning.